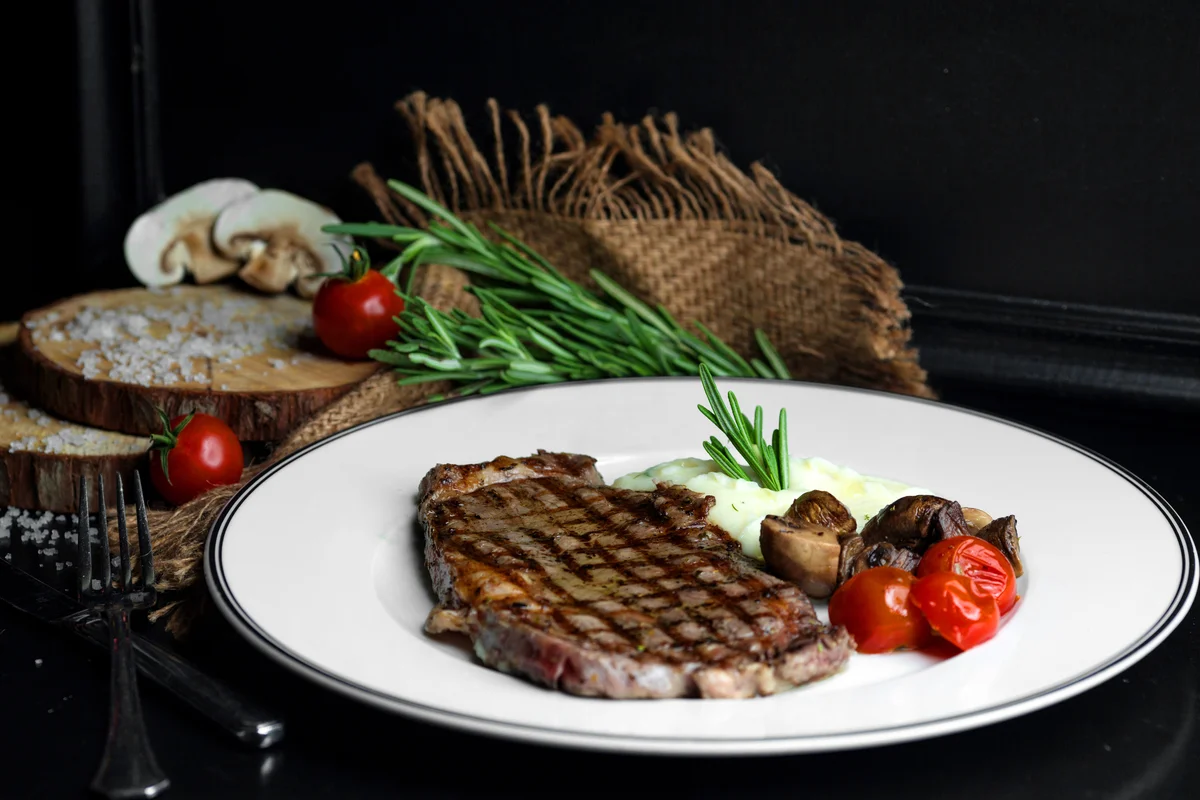
Cooking the perfect steak is both a science and an art, requiring precision, timing, and an understanding of heat. Whether you like your steak rare, medium, or well-done, a steak cooking chart is an essential tool to ensure your desired level of doneness every time. By following the chart’s recommended temperatures and times, you can eliminate the guesswork and consistently create a delicious steak with a perfectly seared exterior and juicy interior.
A steak cooking chart provides detailed guidelines based on internal temperatures for various cuts of steak, making it an invaluable resource for both beginners and seasoned cooks. It not only improves your accuracy but also ensures restaurant-quality results right from your home kitchen. With the help of this guide, you’ll learn how to confidently grill, pan-sear, or broil steak to meet the preferences of everyone at the table.
In this post, we’ll delve into the importance of using a steak cooking chart, how to interpret it, and tips to achieve the best results. Whether you’re hosting a barbecue or cooking a quiet dinner for two, this guide will make your steak-cooking process easier and more rewarding than ever.
Why a Steak Cooking Chart is Essential
Cooking steak to perfection can be a challenge, even for the most seasoned home cooks and professionals. Achieving the right doneness, whether you prefer your steak rare, medium, or well-done, requires both precision and experience. This is where a steak cooking chart becomes an invaluable tool. By offering clear guidance on cooking times and temperatures, it helps take the guesswork out of cooking steak and allows for consistent, mouth-watering results every time. Below, we explore why a steak cooking chart is essential and how it can improve your steak-cooking experience.
Understanding Steak Doneness Levels (Rare, Medium-Rare, Medium, etc.)
One of the most important aspects of cooking steak is understanding the various doneness levels, as this dictates how the steak will taste and feel when you bite into it. A steak cooking chart helps define these doneness levels, which are typically categorized into five main types:
- Rare: The center is cool and red, with a very soft and tender texture.
- Medium-Rare: The center is warm, pink, and juicy, with a slight firmness.
- Medium: The center is slightly pink and warm, with a firmer texture and less juice.
- Medium-Well: The steak is mostly cooked through, with just a hint of pink in the center.
- Well-Done: The steak is fully cooked through with no pink, resulting in a firmer, drier texture.
Each doneness level is defined by a specific internal temperature, and these temperatures can vary slightly depending on the thickness of the steak. A steak cooking chart offers precise temperature recommendations for each doneness level, enabling you to accurately target the desired result. By following a steak cooking chart, you can ensure that your steak is cooked to perfection every time. Without such a guide, it’s easy to either undercook or overcook the steak, leading to a less-than-ideal meal. Using a steak cooking chart is an essential step for anyone who wants to master steak preparation.
Benefits of Using a Cooking Chart for Perfect Results
A steak cooking chart takes the guesswork out of the process and provides several benefits for anyone looking to cook steak perfectly:
- Consistency: One of the biggest challenges when cooking steak is achieving consistent results. A steak cooking chart ensures that you can replicate the same level of doneness every time, making it easier to impress guests or enjoy your favorite meal on a regular basis.
- Ease of Use: Rather than relying on instinct or time alone, a steak cooking chart provides clear, easy-to-follow guidelines that take into account both cooking time and steak thickness. This minimizes the need for constant monitoring and removes the pressure of remembering exact cooking times.
- Versatility: Whether you’re cooking on a grill, stovetop, or oven, the steak cooking chart is designed to work across different cooking methods. It adapts to your specific equipment and the cut of steak you’re using, allowing for greater flexibility in the kitchen.
- Enhanced Flavor and Texture: When cooked to the right doneness level, steak has the perfect balance of flavor, tenderness, and juiciness. A steak cooking chart helps you avoid the common pitfalls of overcooking (which results in dry, tough meat) or undercooking (which can lead to an unsafe or unpalatable texture). The result? A steak that is full of flavor and perfectly tender.
With a steak cooking chart, you can easily master the art of cooking steak, achieving optimal results each time.
Avoiding Overcooked or Undercooked Steaks
Steak cooking is all about balance, and a steak cooking chart is an essential tool for achieving that perfect balance. Overcooking or undercooking your steak can ruin the eating experience, leaving you with either a tough, dry meal or an unsafe, underdone one. Overcooked steak, especially when it’s well-done, becomes tough, dry, and loses the rich flavors that make steak so delicious. On the other hand, undercooked steak can be a health risk or simply not to your liking, with an unpleasantly raw center.
This is where a steak cooking chart becomes invaluable. It provides precise guidelines for achieving the right internal temperature for each doneness level, ensuring that you avoid both overcooking and undercooking. By following the chart’s recommended temperatures, you can ensure that your steak reaches the ideal doneness, resulting in a crispy exterior and a juicy, tender interior.
A steak cooking chart is designed to guide you through each stage of cooking by offering the correct internal temperature ranges for rare, medium-rare, medium, and well-done steaks. For instance, a medium-rare steak is best cooked to an internal temperature of 130°F–135°F, while a well-done steak should reach an internal temperature of 160°F or higher. By using these temperature guidelines, you can be confident that your steak will have the perfect texture and flavor.
Additionally, many steak cooking charts include tips on resting your steak after cooking, which is another important step for achieving optimal doneness. Resting allows the juices inside the steak to redistribute, ensuring that each bite is moist and full of flavor. Without resting, much of the steak’s natural juices will be lost, leading to a drier steak.
In conclusion, a steak cooking chart is essential for anyone who wants to elevate their steak-cooking game. It provides the necessary guidance for consistently achieving the perfect steak, taking the guesswork out of the process. Whether you’re a beginner or a seasoned grill master, using a steak cooking chart will help you cook steaks to perfection every time. It ensures consistency, simplifies the cooking process, and allows you to enjoy steak that’s cooked to your exact preferences. With the help of a steak cooking chart, you’ll have the confidence to cook steak like a pro and impress your friends and family with your culinary skills.
Steak Doneness Levels Explained : steak cooking chart
Understanding the various doneness levels of steak is essential for anyone looking to prepare a steak that matches their ideal taste and texture. From the cool, red center of a rare steak to the fully cooked, firm texture of a well-done steak, each doneness level offers a unique flavor experience. By using a steak cooking chart, you can guarantee that your steak reaches the perfect doneness every time, ensuring a consistent and delicious meal. In this section, we’ll explore the different steak doneness levels, how to measure them, and how to check doneness visually without a thermometer.
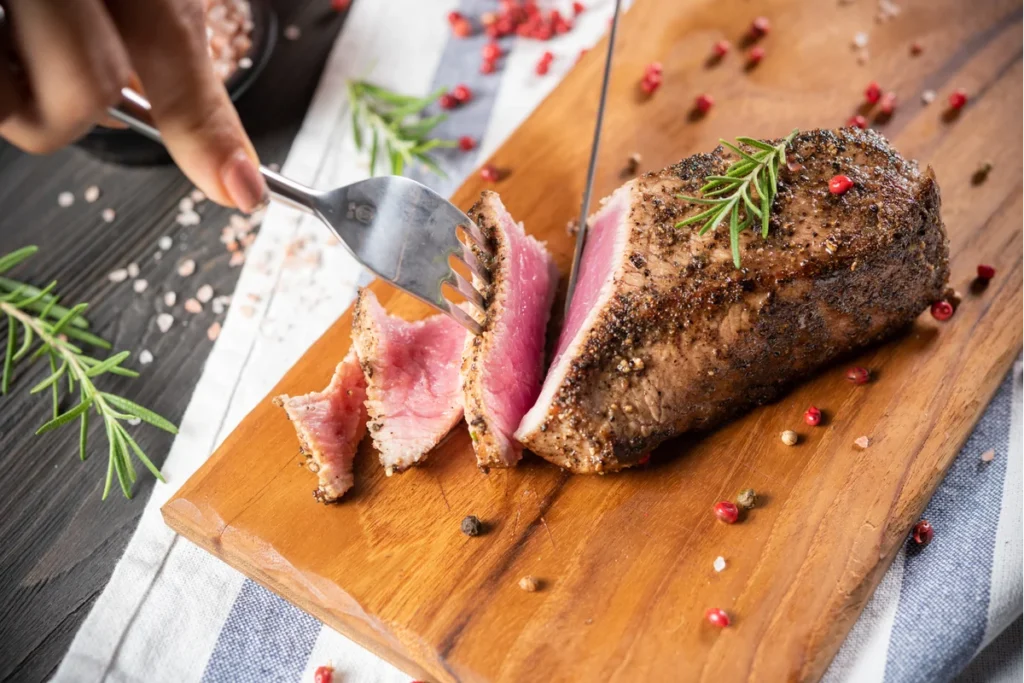
Rare to Well-Done: What Each Level Looks Like
Steak doneness is categorized into five primary levels, each defined by its internal color, texture, and degree of cooking. The appearance of the steak varies significantly between these levels, and the steak cooking chart can help you understand exactly what to expect at each stage.
- Rare: A rare steak has a red, cool center, and the inside remains largely uncooked. The exterior is seared, but the interior stays almost raw. The texture is soft and tender, with a juicy, vibrant red center. If you prefer a steak that’s almost raw, rare is the perfect choice, and a steak cooking chart will guide you to achieve this delicate balance.
- Medium-Rare: Medium-rare steak has a warm, pink center with a slight red hue. It’s seared on the outside and tender on the inside, retaining a juicy, flavorful texture. This doneness level is favored by many steak lovers for its ideal balance of tenderness and juiciness, and using a steak cooking chart ensures you achieve this perfect result every time.
- Medium: A medium steak is cooked more thoroughly but still has a slightly pink, warm center. The steak feels firm with some juiciness remaining in the interior. It’s a good option for those who prefer a cooked steak but still want some pink for flavor, and a steak cooking chart helps pinpoint the ideal cooking time for this doneness.
- Medium-Well: At this level, the steak is mostly cooked through, with only a small trace of pink in the center. The texture becomes firmer, and the steak is less juicy. Medium-well is ideal for those who want their steak nearly fully cooked but with just a hint of pink, and a steak cooking chart takes the guesswork out of getting this doneness right.
- Well-Done: Well-done steaks are cooked all the way through, with no pink left in the center. They are firm, dry, and tend to lose some of their juiciness. Well-done steaks can be less tender, but for those who prefer a thoroughly cooked steak, this is the perfect option, and a steak cooking chart ensures you can cook it just as you like.
A steak cooking chart is key to achieving the ideal texture and doneness for any steak, from rare to well-done.
Internal Temperatures for Different Doneness Levels (Using a Thermometer)
The key to achieving your preferred steak doneness is knowing the internal temperature. A steak cooking chart provides a helpful guide for these temperatures, allowing you to cook your steak with precision. Using a meat thermometer is the most reliable method to measure doneness, as it eliminates guesswork and ensures your steak is perfectly cooked.
Here are the recommended internal temperatures for each doneness level:
- Rare: 120°F to 125°F (49°C to 52°C)
- Medium-Rare: 130°F to 135°F (54°C to 57°C)
- Medium: 140°F to 145°F (60°C to 63°C)
- Medium-Well: 150°F to 155°F (66°C to 68°C)
- Well-Done: 160°F (71°C) and above
To use a thermometer, insert the probe into the thickest part of the steak, making sure to avoid bones or fat, which can give inaccurate readings. The steak cooking chart can guide you on when to remove the steak from the heat source, ensuring it reaches the target temperature. After cooking, let the steak rest for a few minutes. This resting period allows the juices to redistribute and results in a more flavorful and moist steak.
Visual Cues to Check Doneness Without a Thermometer
While a steak cooking chart and thermometer are the most accurate ways to check doneness, visual cues can also provide a helpful indication of how your steak is cooking. These methods are especially useful if you don’t have a thermometer handy but still want to achieve your desired level of doneness.
- Rare: A rare steak will have a cool, red center and very little cooking on the inside. The texture is soft and spongy. Press gently with your finger or tongs—rare steaks will feel very tender with a lot of give.
- Medium-Rare: Medium-rare steaks have a warm, pink center with a slight red hue. When you press on the steak, it should feel soft with a slight bounce back. The outer surface will be firm, but the center will still have some tenderness.
- Medium: At this stage, the steak will feel firmer, but still have some give. The center will remain slightly pink. Pressing the steak will give you resistance, but it will still have a soft center, indicative of the medium doneness.
- Medium-Well: A medium-well steak will have minimal pink left in the center and will feel quite firm when pressed. It will have a slight give but will be much firmer than a medium steak.
- Well-Done: Well-done steaks are firm and dry with little to no give. The interior will be fully browned, and the steak will feel stiff when pressed. The texture will be dense and less juicy.
By using these visual and tactile cues, you can gauge the doneness of your steak if you don’t have access to a thermometer. However, for accuracy and consistency, following a steak cooking chart is always recommended.
The Perfect Steak Cooking Chart
A steak cooking chart is an invaluable tool for anyone looking to cook steaks to perfection, ensuring each cut is prepared to the ideal doneness level, whether it’s a tender filet mignon or a juicy ribeye. The perfect chart provides more than just cooking times; it takes into account steak thickness, varying cooking methods, and specific internal temperatures for different beef cuts. Understanding the factors that contribute to perfect steak results, as outlined below, can elevate your cooking game and ensure consistency every time.

Internal Temperature Chart for Beef Cuts (Filet Mignon, Ribeye, etc.)
Different cuts of beef have varying levels of tenderness, fat content, and moisture, which can affect the way they cook. A steak cooking chart tailored to specific beef cuts provides the internal temperature ranges for each type of steak, making it easier to achieve the desired doneness based on the cut you are working with.
- Filet Mignon: Known for its tenderness and lean nature, filet mignon is best cooked to medium-rare or medium, allowing its subtle flavors to shine without drying out. The internal temperatures for filet mignon are as follows:
- Rare: 120°F–125°F (49°C–52°C)
- Medium-Rare: 130°F–135°F (54°C–57°C)
- Medium: 140°F–145°F (60°C–63°C)
- Ribeye: This well-marbled cut is incredibly flavorful due to its fat content, which helps it retain juiciness throughout cooking. Ribeye steaks can handle higher levels of doneness, but they are most often served medium-rare to medium.
- Rare: 120°F–125°F (49°C–52°C)
- Medium-Rare: 130°F–135°F (54°C–57°C)
- Medium: 140°F–145°F (60°C–63°C)
- T-bone/Porterhouse: These cuts offer both a portion of tenderloin and strip steak. Since they contain different muscle groups, it’s important to monitor the temperature of each section.
- Rare: 120°F–125°F (49°C–52°C)
- Medium-Rare: 130°F–135°F (54°C–57°C)
- Medium: 140°F–145°F (60°C–63°C)
- New York Strip: Known for its beefy flavor and firm texture, the New York strip is ideal for those who prefer a medium-rare to medium steak.
- Rare: 120°F–125°F (49°C–52°C)
- Medium-Rare: 130°F–135°F (54°C–57°C)
- Medium: 140°F–145°F (60°C–63°C)
Each cut of beef has its own ideal internal temperature range, and a steak cooking chart tailored to your specific cut helps you hit the right mark every time. Whether you’re grilling or pan-searing, knowing the appropriate temperature will give you consistent results.
Steak Thickness and Its Impact on Cooking Time
The thickness of your steak has a significant impact on cooking time. Thicker cuts require more time to cook through to the desired doneness level, while thinner cuts cook faster. This is especially important when following a steak cooking chart, as cooking times and temperatures must be adjusted according to the thickness of the meat.
- Thin Steaks (1 inch or less): For steaks that are 1 inch thick or less, cooking times will be much shorter. A medium-rare steak may reach its optimal internal temperature in just 3-4 minutes per side, depending on the heat intensity. Steak cooking charts will typically provide a shorter cooking time for these steaks.
- Thicker Steaks (1.5 inches to 2 inches): For steaks thicker than 1 inch, such as a thick ribeye or T-bone, you’ll need to increase the cooking time to ensure the steak cooks evenly. Typically, thick steaks will need 5-7 minutes per side to achieve medium-rare, depending on the method and heat.
- Extra-Thick Steaks (2+ inches): Extra-thick cuts, like a 2-inch filet mignon or porterhouse, require even more time to cook through. Often, it’s best to use a combination of methods, such as searing the steak on the stovetop and finishing it in the oven or on the grill. The steak cooking chart will suggest longer cooking times and may advise lower heat for thicker steaks to avoid burning the exterior while undercooking the interior.
Adjusting for thickness ensures that each steak reaches the correct temperature in the center without overcooking the outer layers, and a steak cooking chart will help guide you in making these adjustments.
Adjusting Cooking Times for Grilling, Pan-Searing, and Sous Vide
The cooking method you use—whether it’s grilling, pan-searing, or sous vide—will affect how your steak cooks, and a steak cooking chart will often provide tailored instructions based on your chosen method.
- Grilling: Grilling is one of the most popular methods for cooking steak, especially during the warmer months. The direct heat from the grill sears the exterior while allowing the inside to cook to the desired doneness. Grilling times vary depending on the thickness of the steak and the heat of the grill, but the steak cooking chart will give guidelines for both direct and indirect grilling methods. For instance, thinner steaks (1 inch or less) typically require 3-4 minutes per side over high heat for medium-rare, while thicker steaks may need indirect heat after searing to cook evenly.
- Pan-Searing: Pan-searing is a great option for getting a crispy, caramelized exterior on your steak. You can cook steaks on a stovetop using a cast-iron pan, which holds heat well and provides even cooking. For this method, the steak cooking chart will recommend adjusting the heat to avoid over-searing the outside while allowing the inside to reach the correct internal temperature. Thicker steaks benefit from a two-step process: searing each side on high heat and finishing them in a preheated oven to reach the desired doneness.
- Sous Vide: Sous vide cooking allows for incredibly precise temperature control by cooking the steak in a water bath at a constant temperature. This method results in a perfectly even doneness from edge to edge. Steak cooking charts for sous vide will suggest specific times and temperatures depending on the desired doneness level. For example, cooking a steak at 130°F for 1 to 2 hours will yield a medium-rare result, with the steak coming out uniformly cooked to perfection, making sous vide one of the most foolproof methods for achieving precise doneness.
No matter which method you use, a steak cooking chart takes into account each cooking method’s nuances and helps you adjust times and techniques for the perfect result.
Tips and Techniques for Cooking Steak : steak cooking chart
Cooking the perfect steak is an art form that combines the right techniques, timing, and tools to create a flavorful, tender, and juicy result. Whether you are grilling, pan-searing, or broiling, mastering a few essential techniques can elevate your steak game and ensure you consistently achieve mouthwatering results. In this section, we’ll explore three key tips and techniques for cooking steak: searing for a perfect crust, resting to lock in juices, and using a meat thermometer for accuracy.
Searing the Steak for a Perfect Crust
One of the most crucial steps in cooking a steak is searing it to achieve a perfect, flavorful crust. Searing not only creates a beautiful brown exterior but also enhances the steak’s natural flavor through the Maillard reaction, a chemical process that occurs when proteins and sugars in the meat are exposed to high heat. This reaction results in the deliciously complex flavors and aromas associated with a perfectly seared steak.
To sear your steak, follow these steps:
- Preheat your pan or grill: Whether you’re using a cast-iron skillet, grill, or another type of pan, make sure it’s preheated to a high temperature before adding your steak. The surface should be hot enough to create an immediate sizzle when the steak touches it. This high heat is essential for developing the crust.
- Pat the steak dry: Before searing, pat the steak dry with paper towels to remove excess moisture. Moisture on the surface of the steak can hinder the searing process, causing it to steam rather than form a crisp crust. A dry surface is key to getting that golden-brown crust.
- Use oil with a high smoke point: When searing, choose an oil with a high smoke point, such as vegetable oil, canola oil, or grapeseed oil. These oils can handle high heat without burning or smoking excessively, which allows for a perfect sear.
- Don’t overcrowd the pan: Avoid overcrowding your pan or grill, as this can reduce the temperature of the cooking surface and lead to steaming rather than searing. Cook your steaks in batches if necessary.
- Sear each side: Sear each side of the steak for about 2-4 minutes, depending on thickness. You want to develop a rich, caramelized crust without overcooking the interior.
Resting the Steak to Lock in Juices
Once your steak is cooked to the desired doneness, one of the most important steps you can take is to rest the steak before serving. Resting allows the juices that have been driven to the center of the steak during cooking to redistribute evenly throughout the meat. If you cut into the steak immediately after cooking, you’ll lose much of the flavorful juices, leading to a drier steak.
To rest your steak properly:
- Remove from heat: Once the steak reaches the desired internal temperature, take it off the heat source and place it on a cutting board or plate.
- Cover loosely with foil: Tent the steak loosely with aluminum foil to help retain heat without trapping moisture, which can cause the steak’s crust to become soggy.
- Let it rest: The resting period typically lasts 5 to 10 minutes, depending on the size of the steak. Larger cuts, such as a ribeye or T-bone, may need a bit more time, while smaller cuts like filet mignon will need less. Resting time allows the juices to redistribute evenly throughout the steak, ensuring that each bite is tender and juicy.
Using Meat Thermometers for Accuracy
One of the easiest ways to ensure your steak is cooked perfectly every time is to use a meat thermometer. While experienced cooks might rely on visual cues or touch to determine doneness, a meat thermometer provides a more accurate, foolproof method to measure internal temperature. Using a thermometer ensures that your steak reaches the ideal doneness level without the risk of overcooking or undercooking.
Here’s how to use a meat thermometer effectively:
- Insert the thermometer correctly: Insert the meat thermometer into the thickest part of the steak, avoiding the bone or any fat, as this can give inaccurate readings. Make sure the thermometer probe is placed in the center of the meat for the most accurate reading.
- Know the desired temperature: Familiarize yourself with the internal temperature ranges for each doneness level. For instance:
- Rare: 120°F–125°F (49°C–52°C)
- Medium-Rare: 130°F–135°F (54°C–57°C)
- Medium: 140°F–145°F (60°C–63°C)
- Medium-Well: 150°F–155°F (66°C–68°C)
- Well-Done: 160°F (71°C) and above
- Remove the steak at the right moment: As the steak continues to cook after being removed from the heat, it’s important to remove it just before it reaches your target temperature. This phenomenon, known as carryover cooking, will cause the steak’s internal temperature to rise by a few degrees as it rests.
- Check multiple points: For thicker cuts or steaks with uneven shapes, it can be helpful to check the internal temperature at multiple points to ensure that it’s cooked evenly throughout.
Using a meat thermometer takes the guesswork out of cooking steak, providing you with a precise method to achieve the doneness you want. Whether you’re cooking a delicate filet mignon or a thicker ribeye, this tool ensures consistent and reliable results every time.
Common Mistakes to Avoid When Cooking Steak
Cooking the perfect steak requires attention to detail and a good understanding of the key factors that affect how a steak turns out. Even with the best cuts of meat and a steak cooking chart at your disposal, it’s easy to make simple mistakes that can impact the flavor, texture, and juiciness of your steak. Understanding these common mistakes can help you avoid frustration and ensure that every steak you cook is a success. In this section, we’ll explore three common mistakes to avoid when cooking steak: overcrowding the pan or grill, skipping the resting period, and failing to adjust cooking time based on steak thickness.
Overcrowding the Pan or Grill :steak cooking chart
One of the most common mistakes when cooking steak is overcrowding the cooking surface, whether it’s a pan or grill. While it may seem convenient to cook multiple steaks at once, overcrowding can lead to uneven cooking, lack of proper searing, and an overall inferior texture.
When you overcrowd the pan or grill, the heat is spread across more surface area, causing the temperature to drop. This results in the steak steaming rather than searing, preventing the formation of that beautiful, flavorful crust. According to a steak cooking chart, steaks need a consistent, high heat to develop that sought-after brown crust. If the pan or grill isn’t hot enough, you’ll end up with a less flavorful, less textured steak.
To avoid this, follow these tips:
- Cook in batches: If you’re preparing several steaks, cook them in batches to allow ample space for each piece of meat to sear properly.
- Ensure sufficient heat: Whether using a pan or grill, make sure the heat is high enough to produce a strong sear. You can test this by adding a drop of water to the pan—if it sizzles immediately, the heat is ready.
- Leave room for airflow: On the grill, avoid placing steaks too close together. This allows the heat to circulate evenly around each steak.
By avoiding overcrowding, you can ensure that each steak is cooked evenly and has the perfect crust, which is essential for flavor and texture.
Skipping the Resting Period : steak cooking chart
After cooking a steak to perfection, many people are tempted to cut into it immediately. However, skipping the resting period is a critical mistake that can ruin your steak. When a steak is cooked, the juices inside are pushed toward the center due to the heat. If you cut into the steak too soon, those juices will escape, leading to a dry, less flavorful steak.
A steak cooking chart emphasizes the importance of resting your steak for a few minutes after cooking. This resting period allows the muscle fibers to relax, and the juices to redistribute evenly throughout the steak, ensuring a tender and juicy result. Depending on the size and thickness of the steak, the resting period can range from 5 to 10 minutes. Larger cuts, such as a T-bone or ribeye, benefit from a longer rest to ensure the juices are evenly distributed throughout the steak.
To rest your steak properly:
- Remove the steak from heat: Once the steak reaches your desired doneness, remove it from the heat source (pan, grill, or oven).
- Cover loosely with foil: Tent the steak with foil to retain heat while allowing airflow to prevent steaming.
- Let it rest: Let the steak rest for at least 5 minutes, or up to 10 minutes for thicker cuts. This allows the juices to be absorbed back into the meat, creating a flavorful and moist steak.
Not Adjusting Cooking Time Based on Steak Thickness
One of the most important factors in achieving the perfect steak is adjusting cooking times based on the thickness of the steak. A steak cooking chart offers general guidelines for cooking times, but it’s essential to remember that thicker steaks will require more time to cook through compared to thinner ones. Failing to account for steak thickness can result in steaks that are overcooked on the outside while undercooked on the inside, or steaks that are simply too tough.
Here’s how to adjust cooking times based on steak thickness:
- Thin steaks (1 inch or less): Thin steaks, such as flank steak or skirt steak, cook quickly. Typically, these steaks require about 3-4 minutes per side for medium-rare, depending on the heat source. Using a steak cooking chart will guide you to the right temperature range and help you adjust the cooking time accordingly.
- Thicker steaks (1.5 to 2 inches): Medium to thick steaks like ribeye or New York strip will need 5-7 minutes per side for medium-rare, depending on heat intensity. A steak cooking chart will provide more specific guidelines for thicker cuts, but it’s important to adjust your cooking time to ensure the steak cooks through without burning.
- Extra-thick steaks (2+ inches): Extra-thick cuts, such as a 2-inch porterhouse or tomahawk steak, require more time and may need to be finished in the oven after a quick sear on the stovetop or grill. For these steaks, the steak cooking chart can help determine how long to sear on each side and when to transition to indirect heat to cook the steak evenly.
By following the steak cooking chart and adjusting cooking times based on the thickness of your steak, you’ll ensure a perfectly cooked result every time.